O K Guys, I've been promising a post for a design of a cold weather dew
condenser. Her it is.
This device is based on the principle that there is a direct correlation between
Relative Humidity, Ambient Temperature and Dew Point.The main concern that we have in the process of collecting dew is where is the
Dew Point
(temperature at which the moisture in the air condenses into liquid).If we can manipulate the Temperature and or the Relative Humidity we can pretty
much control where the dew point will fall as the dew point follows the other two
factors.
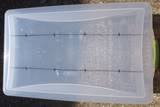
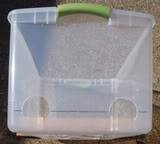
I am going to start off with some initial pictures of the items I used to make this
device. The first picture is of a clear plastic storage box. The 2nd picture is the
lines drawn on the bottom of the box for the 1.25 diameter vent holes.

The next 4 pictures is the drilling of the holes to vent the earth to the inside of the
box.
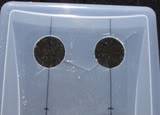
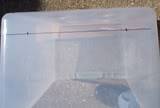
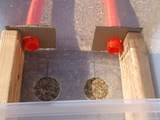
The next 3 pictures are going to show 2 holes drilled into the end of th box for the
hoses that will pipe the warm air into the bottom of the box.
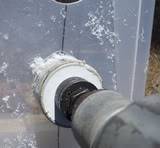
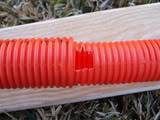
The next 6 pictures will show the fabrication of the Y hose
assembly for applying heat to the bottom of the box. I also
used 2 cardboard spacers since my hose was smaller then
the 1.25 inch holes I had drilled.


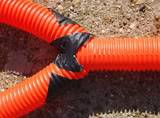
The next 2 pictures will show a vent hole cut into the side of the tube that will
allow heat to be vented out. The 2nd picture shows a section of the tube that
has been cut and is being used to close of the amount of opening. By this
method we can adjust the amount of heat goin into the box and held inside the
hose.

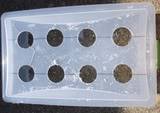
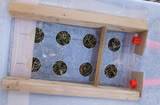
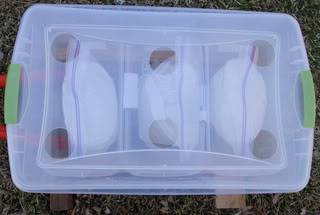
The next picture show the box being loded with smaller storage containers with
bags of slightly salty ice. The salt helps the ice to melt on very cold nights.

The next 2 pictures are of the device completed. You will notice 6 holes cut in the
lid of the box. This is to ventalate the air out of the box. These can be opened
or closed off to also adjust the amount of heat that remains inside the box.
The final picture is of dew dripping off a bag that I had picked up after I had ran
the system for awhile.
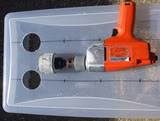
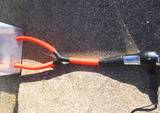
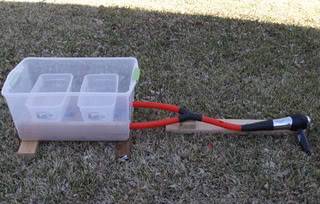
The last picture shows the box complete with the hair dryer attached. Everything is
held togeather with Gaffers Tape. (not duct tape) It handles more heat.
Alright, everything that you see can be purchased at you friendly
neighborhood Walmart or department store. The hose and the gaffers
tape can be found at a Home Depot or a local hardware store.
The concept of operation is relatively simple. The condenser chamber is placed
on the ground resting on two 2"x4". This gives enough space for the ventalation
holes in the bottom of the box to be able to draw moisure from the ground.
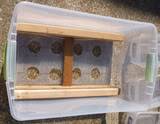
There are two 2x4 in the bottom of the box that allows the smaller storage
containes to be raised off the bottom. This space gives room for the hot air to
be blown into the bottom of the box and then circulated around the smaller
containers and the ice bags or plastic jars by the hair blower. If you look at
picture 9 and 15 you will also see a 1x 2 spacer. Thsi spacer is cut to the
exact length where it can be wedged between the 2x4's to hold them in place.
Additionally the 1x2 piece of wood is placed on a 30 to 40 degree angle.
This will help to deflect the heat up into and around the smaller containers and
the ice bags.
The hair dryer is independantly adjustable for the heating element and the
blower. This helps to maintain optimum inside temperature for different
outside temperatures.
Well there you have it. Let me know what you think?
This is kind of a freeware type thing. If you have any ideas on how to
improve the design let the rest of us know.
MO-1

*

